Virtual Lobby
The virtual lobby is the gateway to your virtual event. Once logged into the lobby you can see your agenda and easily join sessions.
Navigate the virtual lobby
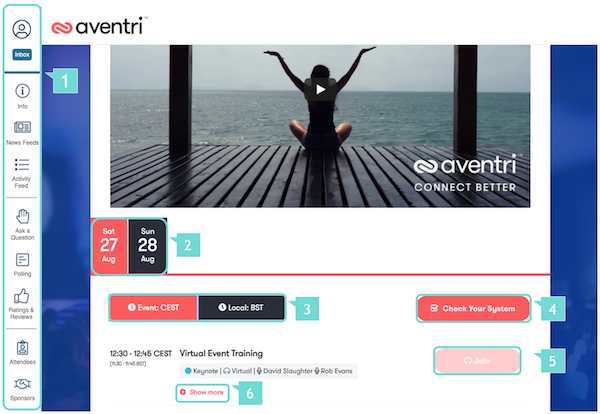
Overview
- 1. The module navbar
- 2. Event dates
- 3. Switch time zone
- 4. Check your system
- 5. Join a session
- 6. Show session info
Join a session from the virtual lobby
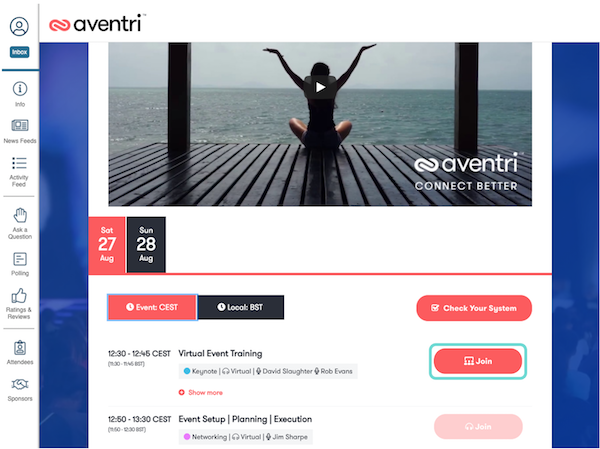
Step 1
- Join a session by clicking on the "Join" button
- When a session hasn’t started the join button will be greyed out

Step 2
- The join button will become active once the session is open
Not able to join a session from the virtual lobby
Answer
- As an attendee you can only join a session once it has started
- Attendees can access a session from 0 - 60min before the scheduled session begins
- The “Join” button will becomes active when the event host starts the session
Sessions in the virtual lobby
Answer
- You can only see the sessions in the virtual lobby which you selected during registration
- To add sessions to your agenda you would have to modify your registration first and then log back into the virtual lobby
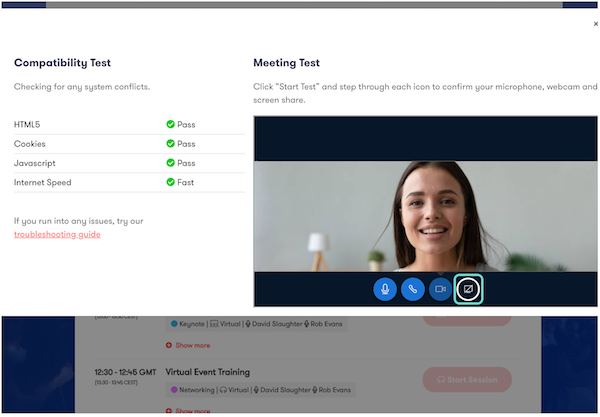
Test your device compatibility and set-up
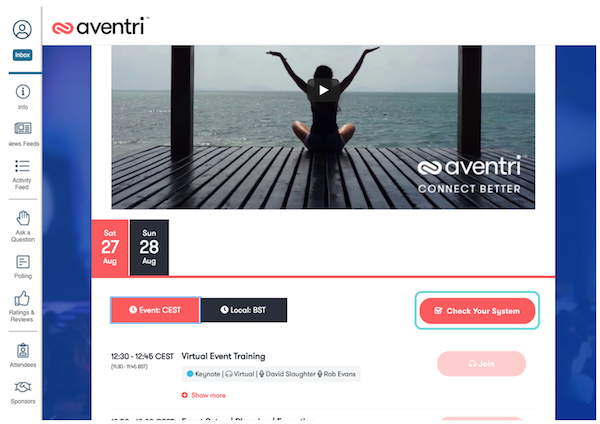
Step 1
- Select check your system
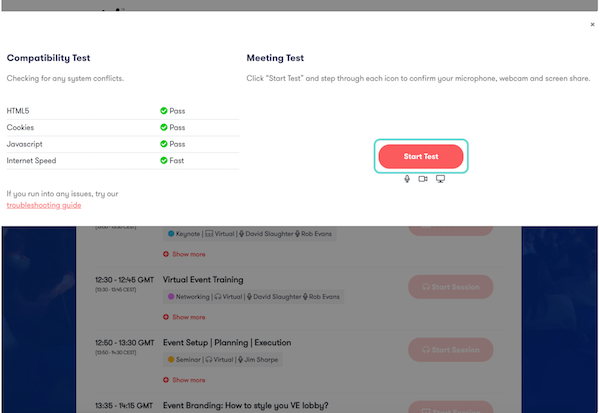
Step 2
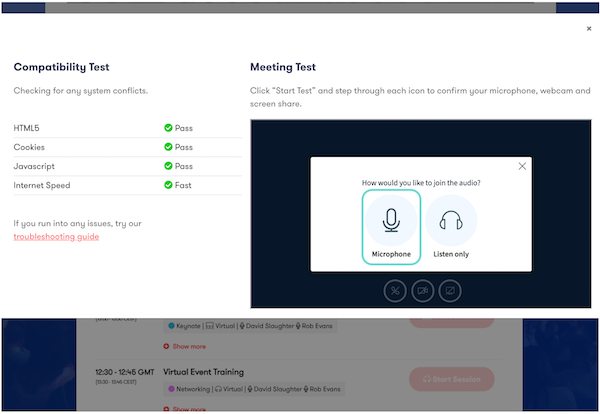
- A pop up will open
- On the left side a compatibility test will take place to check your system which will inform you of any issues
- On the right side you can start a Meeting Test by pressing “Start test”
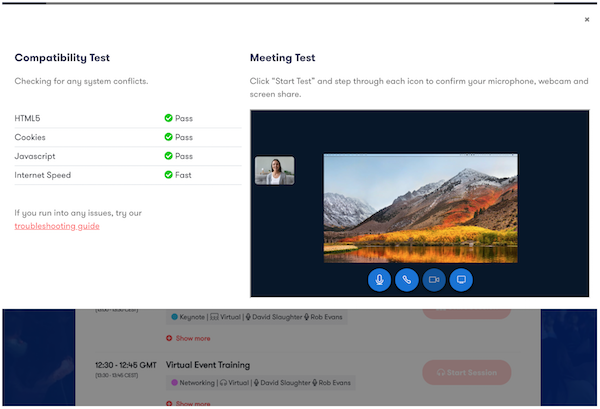
Step 3
- Confirm you can connect your audio
- Select microphone to test both your microphone and headset
Step 4
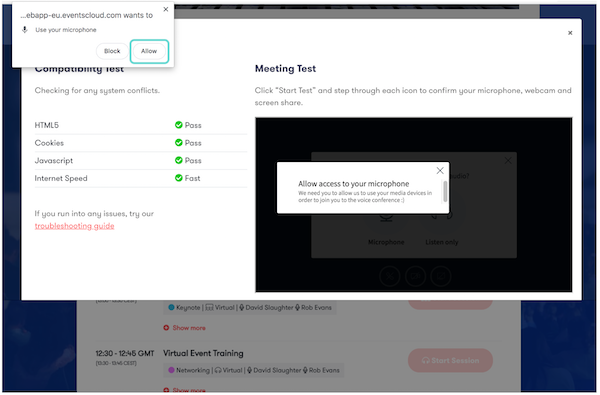
- A permission pop-up will appear in your browser search bar to allow the system access to your microphone
- After clicking allow, your microphone and headset will then be connected
Step 5
- If all is working correctly you can press “Yes” otherwise press “No” and go through the steps again

Step 6
- You have successfully tested your audio
- You can now also test your camera connection

Step 7
- A permission pop-up will appear in your browser search bar to allow the system access to your camera
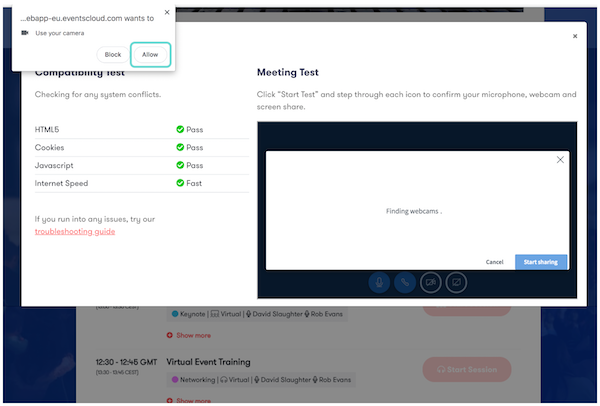
Step 8
- If you have multiple cameras, select the preferred one with suitable resolution and press “Start sharing”
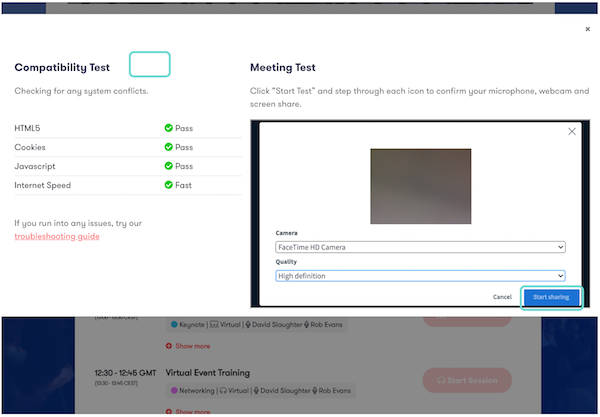
Step 9
- Your webcam has been connected
- You can now test your screenshare functionality
Step 10
- Select the screen you would like to share
- You have successfully tested all components and are ready for the event
Check your internet speed
Step 1
- Select "Check Your System" in the virtual lobby
Step 2
- A popup will appear on the left hand side while a test runs automatically
- If you see "Fast" next to internet speed you are good to go
Planning a virtual event?
Click here for more information on Aventri's virtual event solutions